Firebase Remote Config with React Navigation 5
Change the behaviour and appearance of your app without publishing an app update, at no cost, for unlimited daily active users. This technique is called as Remote Configuration and Firebase with a lot of features also provide Remote Config.
If you’re not familiar with Firebase Remote Config use-cases and how it can help you save weeks/months effort — you may consider reading Exploring Firebase Remote Config.
In this article we will be exploring the most simple yet sophisticated use-case of Firebase Remote Config: Switch for a crisis time — As we all know crisis break out at the least expected moment, utilizing Remote Config as a kill switch or at least an off switch that’ll let you catch a breath 😅.
So, let’s go ahead and implement Firebase Remote Config with React Navigation 5 to control app behavior at crisis time with a single click.
Prerequisite
- React Native
If you’re already familiar with React Native then you’ll be able to get moving with React Navigation & React Native Firebase quickly! If not, you may want to read sections 1 to 4 (inclusive) of React Native Express first, then come back here when you’re done.
2. React Navigation
For routing and navigating within your React Native App, follow and experiment with React Navigation 5. It should cover enough for you to know how to build your typical small mobile application, and give you the background that you need to dive deeper into the more advanced parts of React Navigation.
React Native Firebase — Server Side or In Firebase Console
If you are done with the above requirement then open your Firebase Project Console and navigate to Remote Config page. (In left drawer under Engage)
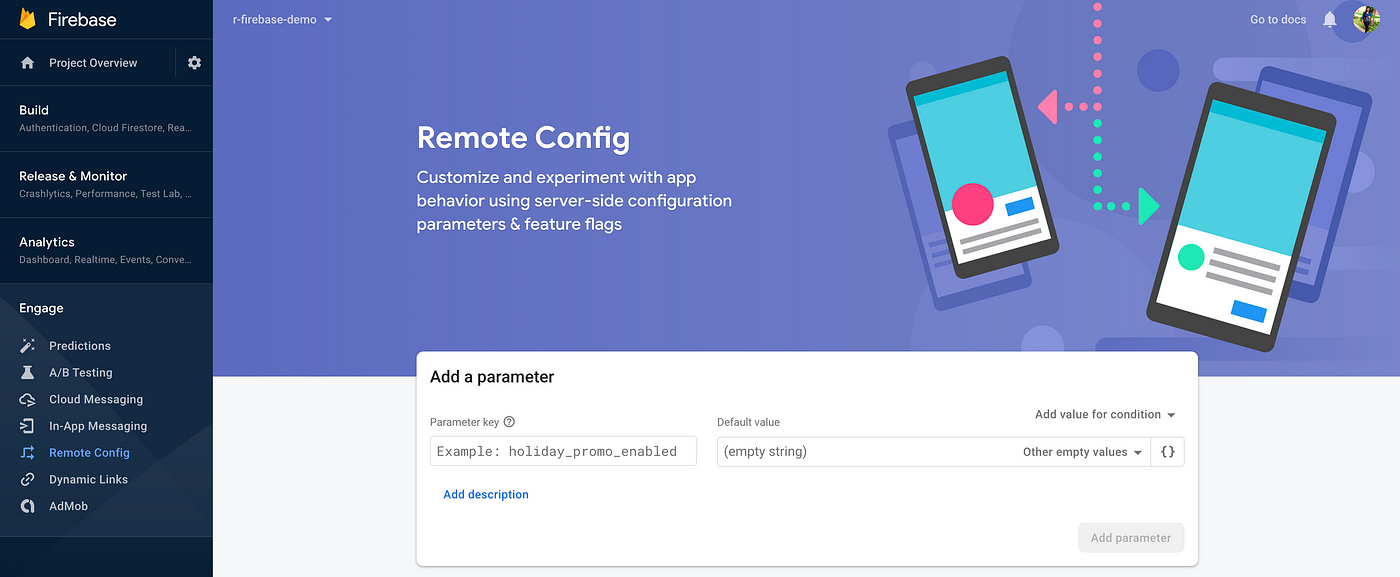
Now here you will get a Window titled Add a parameter which contains two main field’s Parameter Key and Default value
While name Parameter Key be careful as this same key will be used in our App to get the data.

For our kill switch usecase, we will create 1 boolean Parameter called IS_APPLICATION_ON and assign its value as true.
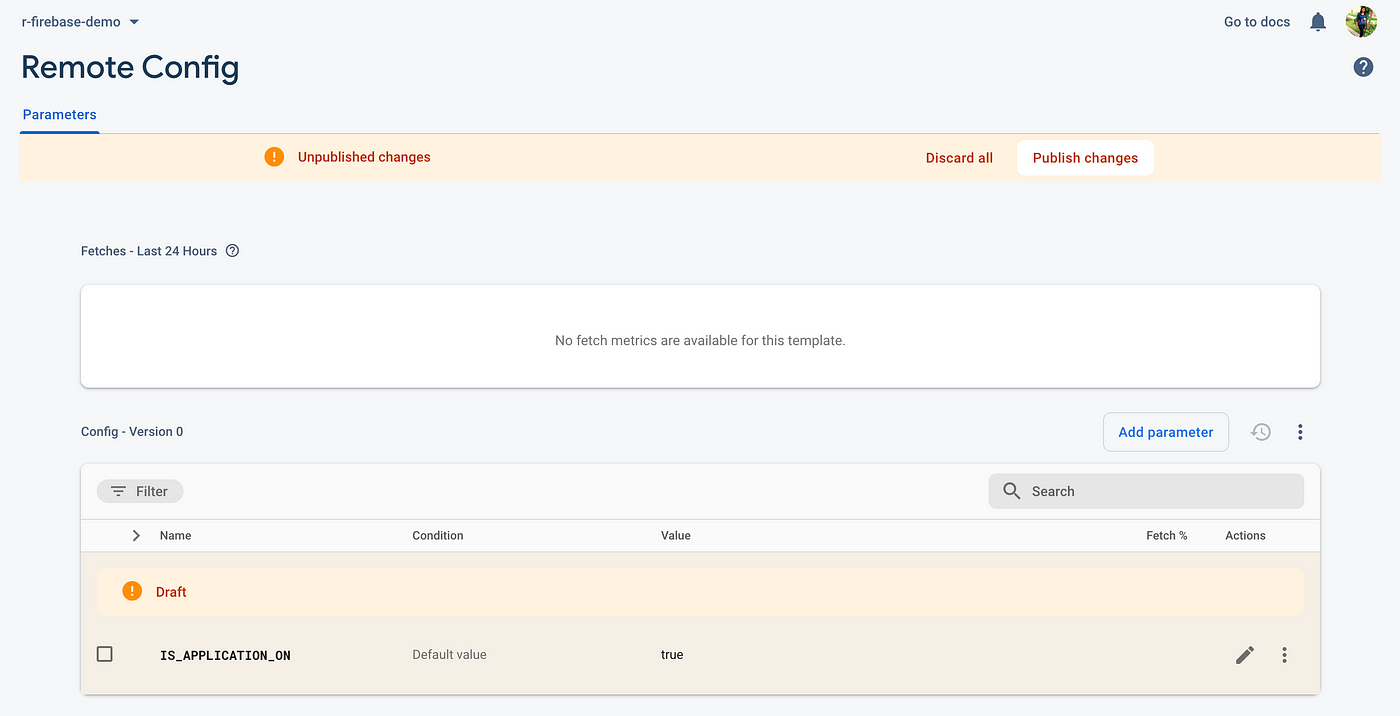
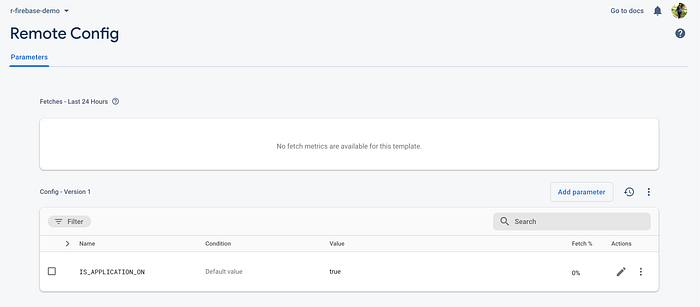
After creating the required parameter click on Publish changes, you will get a prompt confirming “Once you publish, changes are immediately available to your apps and users” — but we have not yet connected the app so simply press OK. Published changes will will look like below:
And now we are all done with the server side configuration. Let’s move on to the client side — React Native codebase.
Lets checkout our React Native App code base, following is the directory structure:
todo-app
--> android
--> ios
--> index.js
--> src
-- --> App.container.js
-- --> routes
-- -- --> home.route.js
-- -- --> index.route.js
-- ...
index.js
import React, { Component } from 'react';
import { AppRegistry } from 'react-native';
import { Provider } from 'react-redux';
import { store } from './src/stores';
import App from './src/App.container';
import { name as appName } from './app.json';export default class todoApp extends Component {
    render() {
        return (
            <Provider store={store}>
            <App />
            </Provider>
        );
    }
}AppRegistry.registerComponent(appName, () => todoApp);
App.container.js
import 'react-native-gesture-handler';
import React from 'react';
import { StatusBar, View } from 'react-native';
import Proptypes from 'prop-types';
import { connect } from 'react-redux';
import { Route } from './routes/index.route';
import { enableScreens } from 'react-native-screens';
import { result } from 'lodash';
import { OverlaySpinner } from './components';
import { appContainerStyle, statusBarStyle } from './themes/application.styles';enableScreens();const App = ({ showSpinner }) => {
    return (
        <View style={appContainerStyle}>
            <StatusBar translucent {...statusBarStyle} />
            <Route />
            <OverlaySpinner showSpinner={showSpinner} />
        </View>
    );
};App.defaultProps = {
    showSpinner: 0
};App.propTypes = {
    showSpinner: Proptypes.number.isRequired
};export const mapStateToProps = ({ spinner }) => ({
    showSpinner: result(spinner, 'count', 0)
});export default connect(mapStateToProps, null)(App);
index.route.js
import React from 'react';
import { NavigationContainer } from '@react-navigation/native';
import HomeScreens from './home.route';export const Route = () => {
    return (
        <NavigationContainer>
            <HomeScreens options={{ animationEnabled: false }} />
        </NavigationContainer>
    );
};
home.route.js
import React from 'react';
import { createStackNavigator } from '@react-navigation/stack';
import Announcements from '../screens/Announcements/Announcements.screen';
import Home from '../screens/Home/Home.screen';
import { colors, fonts } from '../themes/constants.styles';const Stack = createStackNavigator();
const HomeStack = createStackNavigator();const HomeScreens = () => (
    <HomeStack.Navigator
        screenOptions={() => ({
            headerStyle: {
            backgroundColor: colors.PRIMARY_HEADER_BG
        },
        headerTitleStyle: {
            color: colors.PRIMARY_APP_BG,
            fontSize: fonts.FONT_SIZE_XL,
            fontFamily: fonts.FONT_FAMILY_BOLD
        }
        })}>
        <Stack.Screen
            name='Home'
            component={Home}
            options={{
                title: "Let's Todo"
            }}
        />
        <Stack.Screen
            name='Announcements'
            component={Announcements}
            options={{
                title: "What's New?"
            }}
        />
    </HomeStack.Navigator>
);export default HomeScreens;
Our todoApp is all set with basic routing using React Navigation 5. Let’s get started with React Native Firebase.
React Native Firebase — Client Side or In App
Please follow React Native Firebase Getting Started guide to add required packages and perquisite:
- Install core package —
@react-native-firebase/app - Install analytics package —
@react-native-firebase/analytics - Create a new Firebase project
- Android Setup
- iOS Setup
- Autolinking & rebuilding
After the usual Firebase setup (adding todoApp to Firebase project and pasting the google-services.json file) add Remote Config package:
# Install the remote-config module
npm install --save @react-native-firebase/remote-config

# If you're developing your app using iOS, run this command
cd ios/ && pod install
You are all set to use firebase remote-config module in your code base!! 😎
- Create
firebaseRemoteConfig.config.jswithin todoApp/src/configs/:
Use
FETCH_INTERVALto define duration for caching remote config:During app development, you might want to refresh the cache very frequently (many times per hour) to let you rapidly iterate as you develop and test your app
The default and recommended production fetch interval for Remote Config is 12 hours, which means that configs won’t be fetched from the backend more than once in a 12 hour window, regardless of how many fetch calls are actually made.
// data is locally cached for FETCH_INTERVAL in seconds
export const FETCH_INTERVAL = 43200;// Feature names constants, use them to reference to a feature
export const IS_APPLICATION_ON = 'IS_APPLICATION_ON';const config = {};
config[IS_APPLICATION_ON] = false;export default config;
- Create
firebase.util.jswithin todoApp/src/utils/:
Checkout Firebase RemoteConfig service interface to understand available methods, syntax and usage, for example:
setDefaults(),fetch(),activate(),getAll(),asBoolean()etc.
import remoteConfig from '@react-native-firebase/remote-config';
import firebaseRemoteConfig, {
    FETCH_INTERVAL
} from '../config/firebaseRemoteConfig.config';// set defaults
remoteConfig().setDefaults(firebaseRemoteConfig);// fetch remote config
export const fetchRemoteConfig = () => {    // data is locally cached for FETCH_INTERVAL
    const fetch = remoteConfig().fetch(FETCH_INTERVAL);
    return fetch
        .then(() => remoteConfig().activate())
        .then(() => {
            return remoteConfig().getAll();
        })
        .then(snapshot => {
            return {
                IS_APPLICATION_ON: snapshot
                    .IS_APPLICATION_ON
                    .asBoolean()
            };
        })
        .catch(() => firebaseRemoteConfig);
};export default fetchRemoteConfig;
- Create
firebase.action.jswithin todoApp/src/stores/actions:
import { createAction } from 'redux-actions';
import { fetchRemoteConfig } from '../../utils/firebase.util';
import { showSpinner, hideSpinner } from './spinner.action';
export const SET_FIREBASE_REMOTE_CONFIG = 'SET_FIREBASE_REMOTE_CONFIG';
export const setFirebaseRemoteConfig = createAction(SET_FIREBASE_REMOTE_CONFIG);export const initializeFirebase = () => async dispatch => {
    try {
        dispatch(showSpinner());
        const firebaseRemoteConfigData = await fetchRemoteConfig();
        dispatch(setFirebaseRemoteConfig(firebaseRemoteConfigData));
        dispatch(hideSpinner());
    } catch (error) {
        console.log('Firebase init error', error);
    }
};
- Create
firebase.reducer.jswithin todoApp/src/stores/reducers:
import RemoteConfigDefault from '../../config/firebaseRemoteConfig.config';const initialState = { ...RemoteConfigDefault };export const firebase = (state = initialState, action) => {
    const { payload } = action;
    switch (action.type) {
        case 'SET_FIREBASE_REMOTE_CONFIG':
            return { ...payload };
        default:
            return state;
    }
};export default firebase;
- Now within
App.container.js, fetch remote config as shown below:
import 'react-native-gesture-handler';
import React, { useEffect } from 'react';
import { StatusBar, View } from 'react-native';
import Proptypes from 'prop-types';
import { connect } from 'react-redux';
import { Route } from './routes/index.route';
import { enableScreens } from 'react-native-screens';
import { noop, result } from 'lodash';
import { OverlaySpinner } from './components';
import { initializeFirebase } from './stores/actions/firebase.action';
import { appContainerStyle, statusBarStyle } from './themes/application.styles';enableScreens();const App = ({ showSpinner, fetchFirebaseConfig }) => {    useEffect(() => {
        fetchFirebaseConfig();
    }, [fetchFirebaseConfig]);    return (
        <View style={appContainerStyle}>
            <StatusBar translucent {...statusBarStyle} />
            <Route />
            <OverlaySpinner showSpinner={showSpinner} />
        </View>
    );
};App.defaultProps = {
    showSpinner: 0,
    fetchFirebaseConfig: noop
};App.propTypes = {
    showSpinner: Proptypes.number.isRequired,
    fetchFirebaseConfig: Proptypes.func.isRequired
};export const mapStateToProps = ({ spinner }) => ({
    showSpinner: result(spinner, 'count', 0)
});export const mapDispatchToProps = dispatch => ({
    fetchFirebaseConfig: () => dispatch(initializeFirebase())
});export default connect(mapStateToProps, mapDispatchToProps)(App);
Remote config is now available in redux store. Let’s use it to implement kill switch with React Navigation 5.
Read the value of IS_APPLICATION_ON from redux store using useSelector module available within react-redux package.
We will add condition to only inject MaintenanceScreens stack within NavigationContainer on the basis of remote config parameter isApplicationOn.
- Modify
index.route.jsas show below:
import React from 'react';
import { NavigationContainer } from '@react-navigation/native';
import { useSelector } from 'react-redux';
import HomeScreens from './home.route';
import MaintenanceScreens from './appMaintenance.route';export const Route = () => {    const isApplicationOn = useSelector(
        state => state.firebase[IS_APPLICATION_ON]
    );return (
        <NavigationContainer>
            {isApplicationOn ? (
                <HomeScreens
                    options={{ animationEnabled: false }} />
            ): (
                <MaintenanceScreens
                    options={{ animationEnabled: false }} />
            )}
        </NavigationContainer>
    );
};
Where MaintenanceScreens stack is fairly simple and defined as below:
appMaintenance.route.js
import React from 'react';
import { createStackNavigator } from '@react-navigation/stack';
import AppMaintenance from '../screens/AppMaintenance/AppMaintenance.screen';const Stack = createStackNavigator();
const MaintenanceStack = createStackNavigator();const MaintenanceScreens = () => (
    <MaintenanceStack.Navigator>
        <Stack.Screen
            name='AppMaintenance'
            component={AppMaintenance}
            options={{ headerShown: false }}
        />
    </MaintenanceStack.Navigator>
);export default MaintenanceScreens;
Tada! Now you are all set to control your app availability during crisis time.
As of now the remote config parameter IS_APPLICATION_ON is set to true in Firebase console so you should be able to see the AppScreens as shown below:

Lets try turning off the application from Firebase console:

Once you publish these changes, next time the app fetches the remote configuration** it will redirect to Maintenance Stack from where user will not be able to navigate to any other screen or use any feature in the app — “App is under maintenance!”
**This depends on the value of FETCH_INTERVAL set in the app, for example if the value is set to 720 seconds then app will cache the remote config for 720seconds before making the next request.

Firebase Remote Config is a powerful feature; you can configure practically whatever you want from base strings to custom functionality. Also, you can target it per a specific audience, and this is awesome (will be covered in my upcoming article)
Project In GitHub
References
I hope that my tutorial was clear enough to understand and helpful for you 🙌